• Skip to main content
  • Skip to footer

The Horse's Back

Body Talk for Thinking Owners

  • Home
  • Articles
  • BEMER
  • Store
    • Store
    • Shipping & Returns
    • Support
  • Equine Healthworks
    • Bodywork for Horses
    • Reviews
    • Leave a Review
  • About & Contact
    • About
    • Contact

equine massage

How to Create Better Before And After Photos of Horses (and Spot Misleading Ones)

February 22, 2024 by Jane @ THB 3 Comments

Bodyworkers love before and after photos. Done correctly, they can show great results of our work, making them powerful promotional tools.

Equally, if done incorrectly, they may say something rather different to what we want. In fact, there are many ways to leave areas of doubt and raise viewer questions. That’s why I rarely use them anymore.

To help you avoid some of the pitfalls, here are some pointers for making your before and after bodywork photos more effective.


1.  Make sure the horse is standing relaxed and in the same position

It sounds obvious, but so many people get this wrong.

In some photos, the horse is actually doing different things, or looks as if it has just paused during eating, stepping forward, looking into the distance, etc.

All of these things can change its posture, just as post-bodywork relaxation can. This is not comparing like with like.

The horse needs to be standing in a settled state. Standing square if possible, or otherwise in its default ‘parked’ position.

Either way, all four feet need to be on the ground, even if standing square isn’t possible.


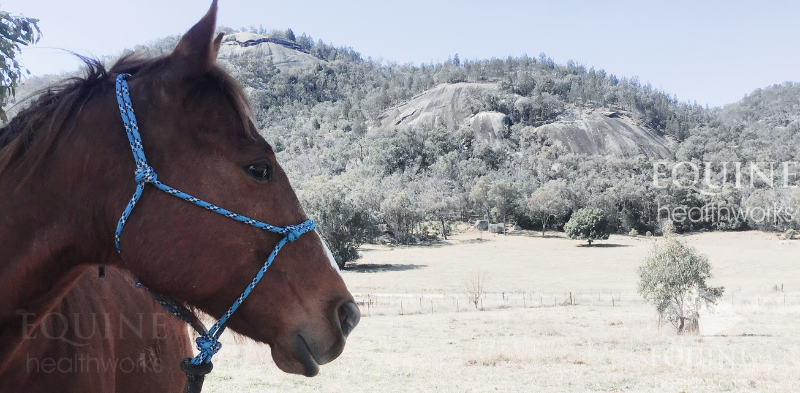
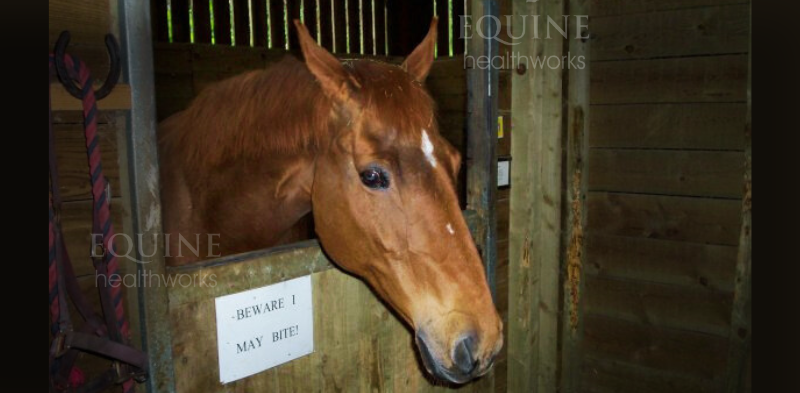
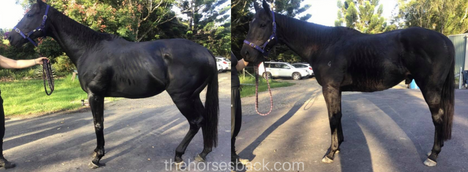
Example 1: When the horse can’t stand comfortably

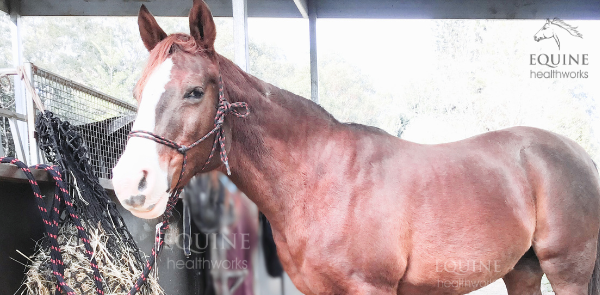
This OTTB was unable to stand without resting a hindlimb due to his sacroiliac and lumbosacral issues.

While this is part of his problem, and the owner and I knew that, nobody looking at the photos can be expected to know it. He looks like he’s just having a rest. If it’s not self-evident, it’s not worth using.

OTTB with hoof imbalance (negative plantar angles) and sacroiliac issues. Without appropriate hoofcare over time, his problems would simply persist. (c) thehorsesback.com


2. Use the same lens angle

This must be the second biggest error in before and after photos: One photo is taken with the lens angled slightly downwards, while the other is more level. This can unintentionally change how the horse’s outline looks.

Here’s how you can tell.

  • First, look at how the lens is positioned for good square-on conformational photos. It’s usually somewhere on the girthline, pointing horizontally around halfway up the horse’s body.
  • Now create an imaginary tracking line running in front of and behind each front hoof.
  • The distance between these lines should be roughly the same in both photo (when the horse is standing fairly straight).
  • If there’s a wider space in one photo, then the lens is probably angled downwards.
  • To compare like with like, the distance needs to be the same in both.
The distance between imaginary tracking lines can help show whether the lens angle is the same, or close to it. The horse is standing slightly wider in the first image, but the distances are still similar.


3.  Ensure the lighting direction is the same

This is simple to achieve, but so many people get it wrong.

Changes in lighting can highlight or obscure ribs, bony landmarks, tight muscles, you name it. There can be numerous changes to what we’re seeing.

Yet in some photos, the horse is in a different location, it’s a different time of day, or even indoors in one photo, and outdoors in the other.

To get a true and fair representation of the improvements, ensure the set up is close to identical in each photo, so that lighting changes don’t create a false impression.

Your great results need to shine on their own.


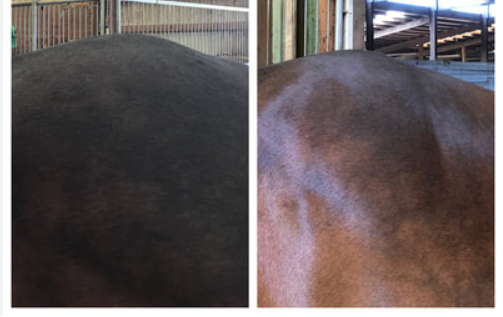
Example 2: Poor set up

These age-old, low res photos from my files were only taken as records over 15 years ago. Afterwards, I certainly wished I’d organised the taking of them better.

Taken at the start of session 1 and session 3, they show a change in coat colour. However, the passage of time and his weight gain can also account for this…

This TB had old fence injuries to the hindlimbs and lumbosacral issues. (c)thehorsesback.com

In this age of Canva, it’s not worth trying to explain changes that can come with other explanations.


4.  Take photos in the same season

All too often we see a before photo taken in winter, and an after photo taken in summer.

So guess what? The horse looks worse when it has a long, dull winter coat.

And it looks vastly improved in the summer, when it has a short, gleaming coat. Even more, it has a bellyful of tucker.

It’s better to avoid such a major difference, as it again only serves to obscure your great results.


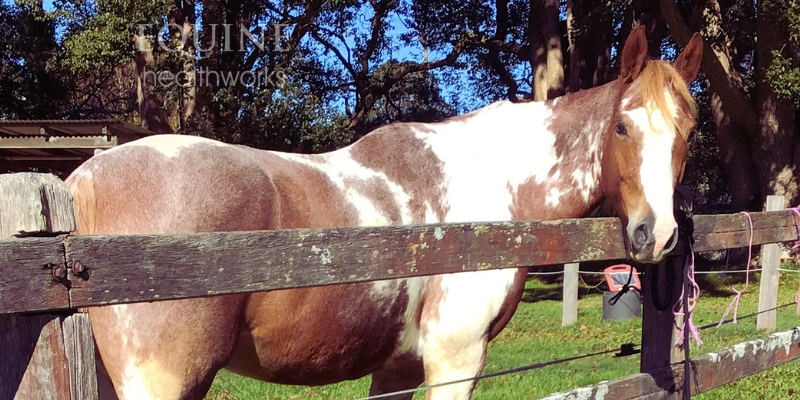
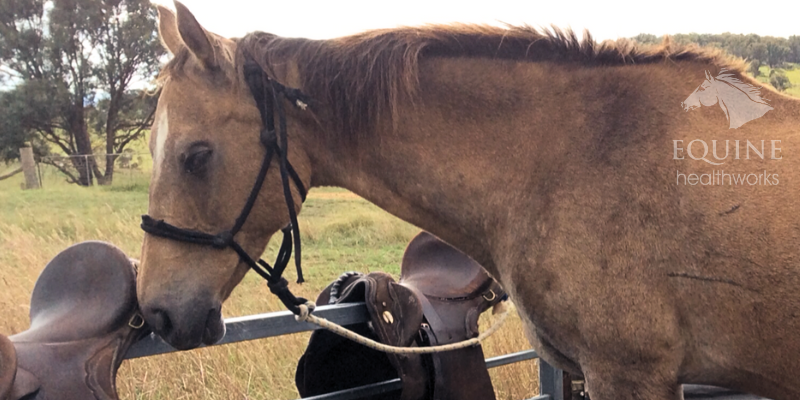
Example 3: When it’s OK to break the rules 

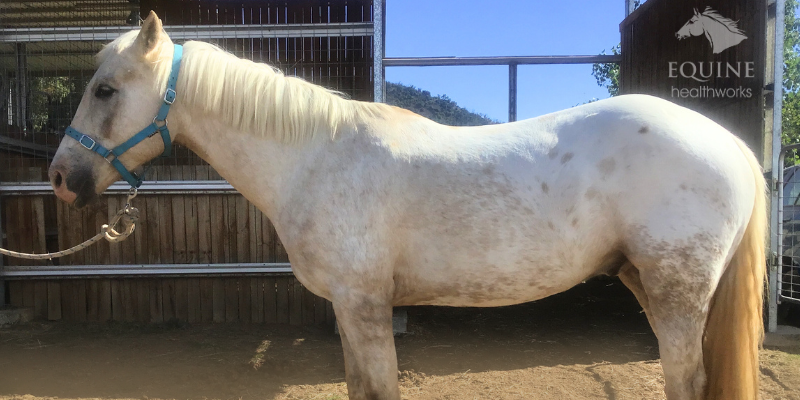
The following photos of the paint horse were originally intended for my personal records. 

Shortcomings are clear: the horse is facing a different way; one photo is not fully square-on; horse is looking at camera; standing in a different location in the yard.

The strengths are big ones: same lens height and angle; lighting similar.

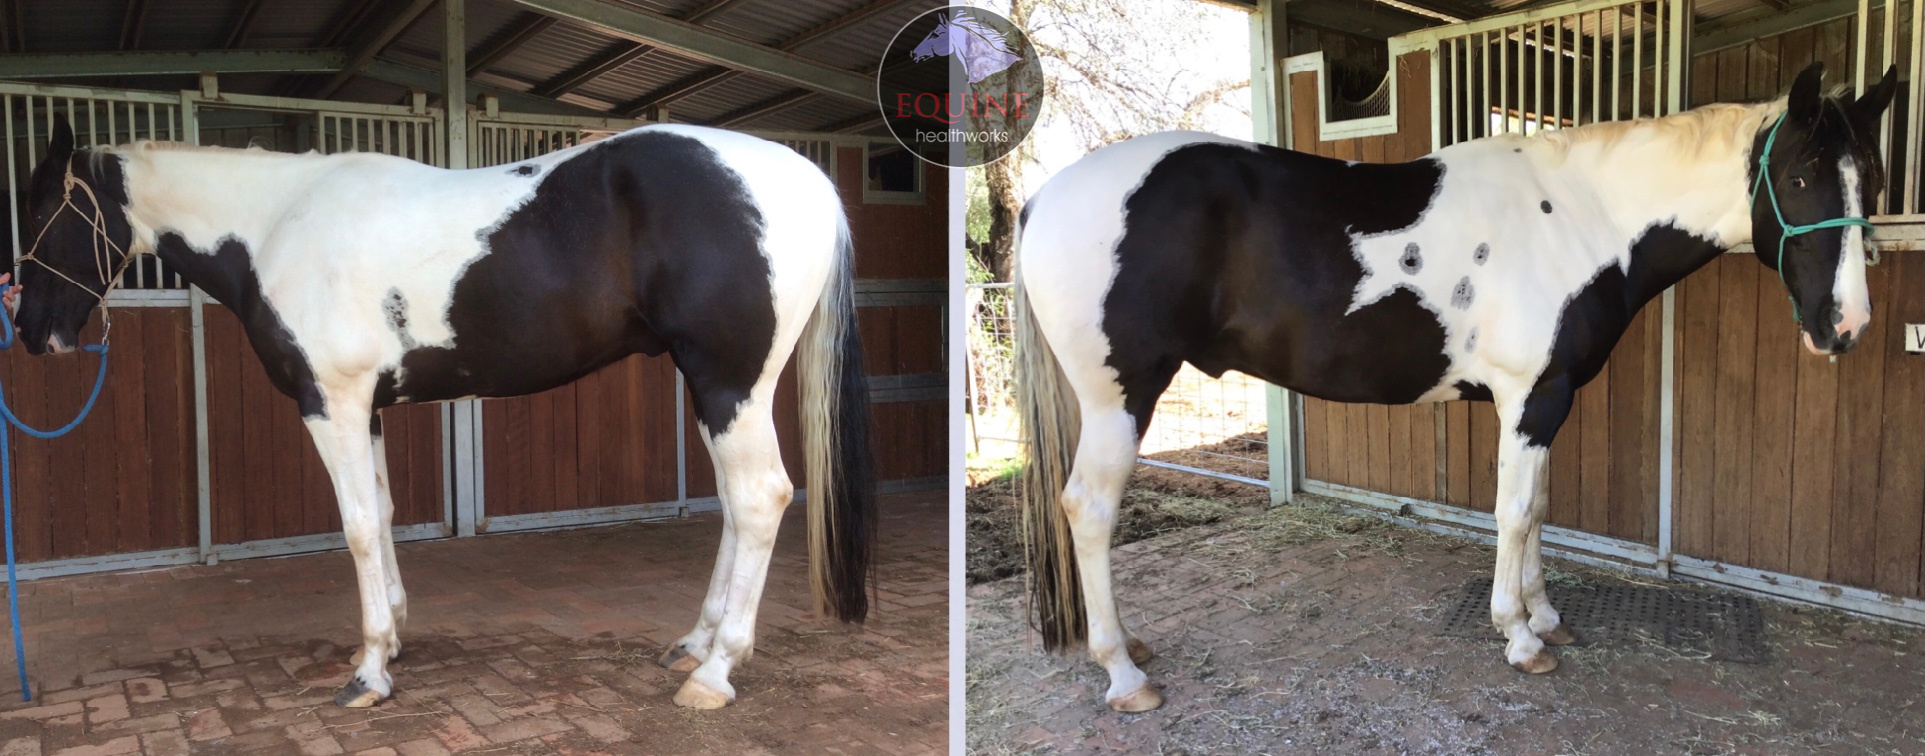
As this is about posture and not muscle development, the changes are unmissable. I gave credit to hoof balance improvement as well as bodywork.  

I would never plan to do a before and after in this way – if this horse’s changes had been minor, the photos wouldn’t have worked at all.


5. Include the legs!

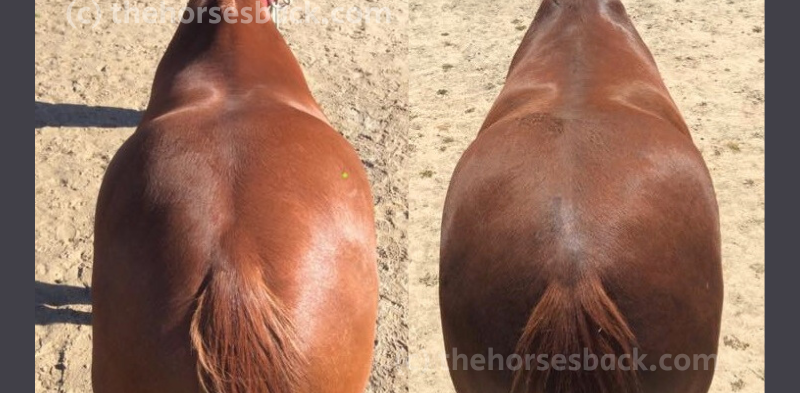
It’s very common to see before-and-after photos showing only the horse’s back from a side-on view, or only the hindquarters from the rear.

This is to leave rather a lot of relevant information out of the image.

Why? Because without the limbs and/or head and neck in the image, your viewer can’t assess the horse’s posture.

Instead, they’re asking themselves questions such as: Is the horse standing square? Is it standing under or camped out? Is it angled away from the camera?

Most importantly, the simple matter of foot placement affects how the back and hindquarters appear in your two photos.

A close up image removes all the reference points that help viewers to understand what the image is supposed to show.

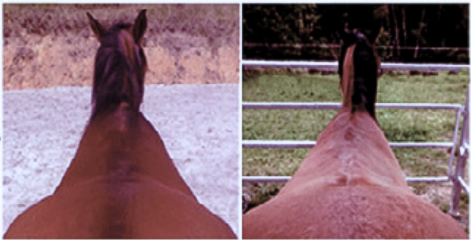
The exception is the overhead view down the back, as the legs obviously can’t be seen. In these cases, including the head and neck is helpful, as it says a lot about posture.

Example 4: Including extra information

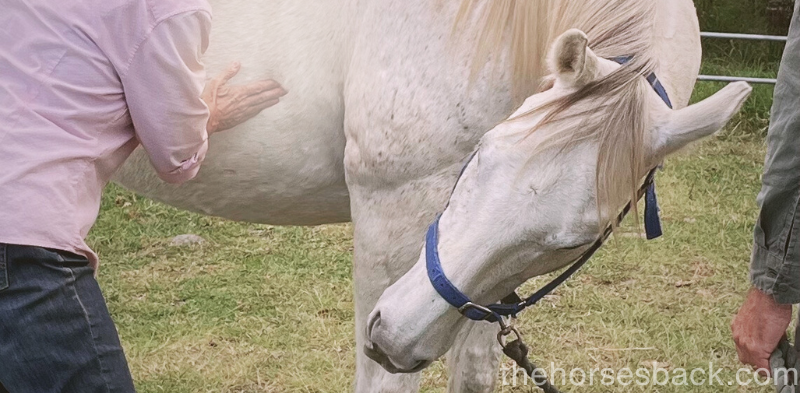
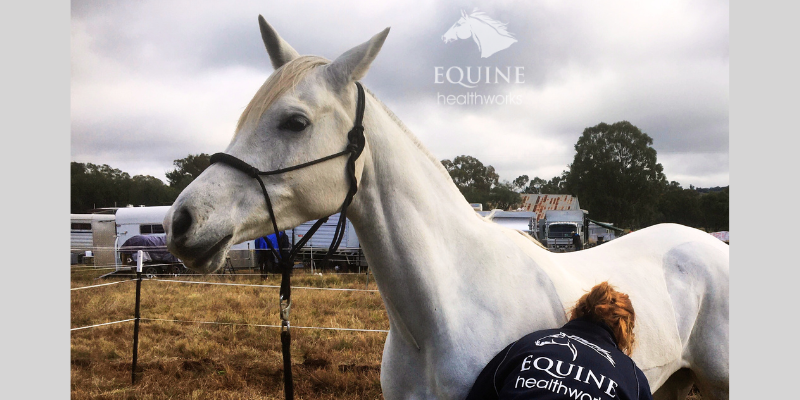
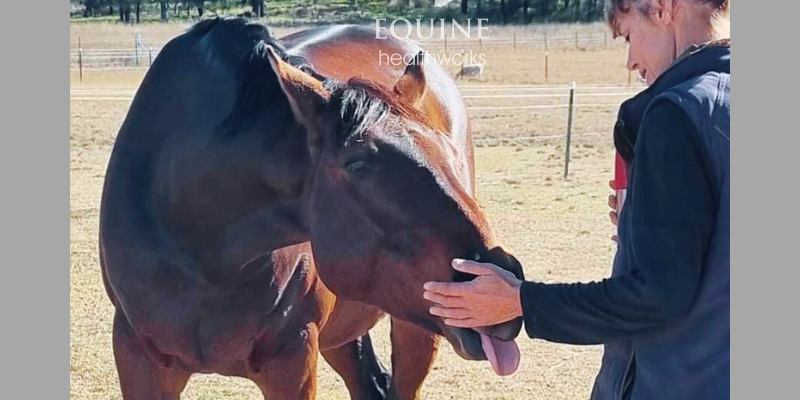
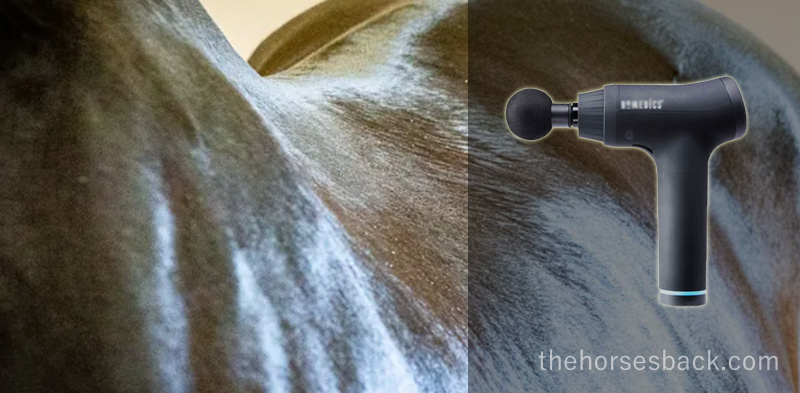
Here are the full images of the WB used in the header for this post.

Both pics were taken in the same spot, but at different hours of the day. I couldn’t alter that, but it did mean that the sunlight was different and this accentuates the shoulder imbalance in the first picture.

What is important is that a lot is included in the images. This allows us to reference that the hindquarters are square-on and the head and neck position close to the same height.

I always explain that that the owner was also doing in-hand training with the horse, and had instigated hoofcare improvements.


6. Select the same stage in the session

You are not comparing like with like if your before photo is taken at the start of a session, and the after photo is taken at the end of a session. You may indeed be showing a valid change in the horse, BUT…

Many therapeutic approaches have a pain-relieving effect, which is often temporary. Posture can temporarily improve.

Once the effect wears off, the horse returns to experiencing the uncomfortable effects of its pathologies again. At this point, all the improvements may cease to be visible.

It’s a bit like taking a photo when the horse is on pain relief, and saying ‘here, look at this great change’.

A more valid comparison is to show the horse at the beginning of session one and then at the START of a later session.

This shows how the improvement has held once the horse returned to its regular routine.


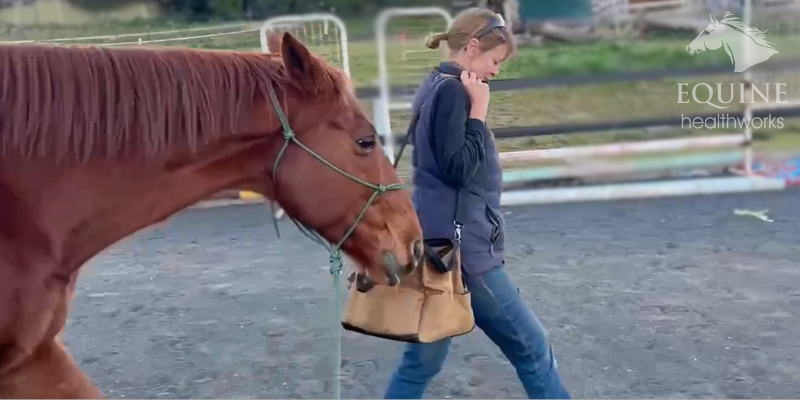
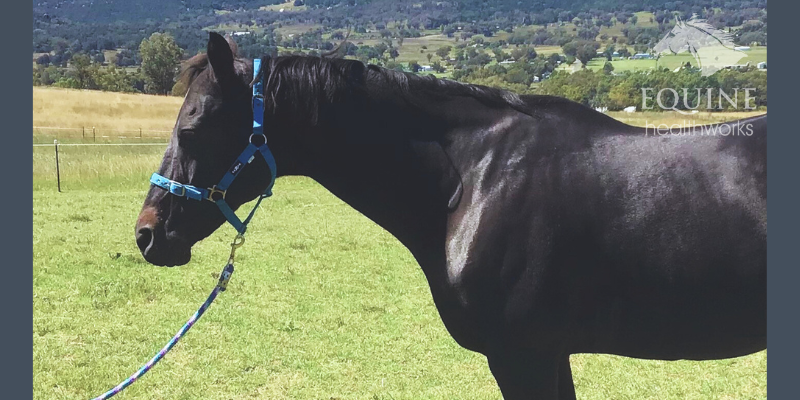
Example 5: When a sequence works better

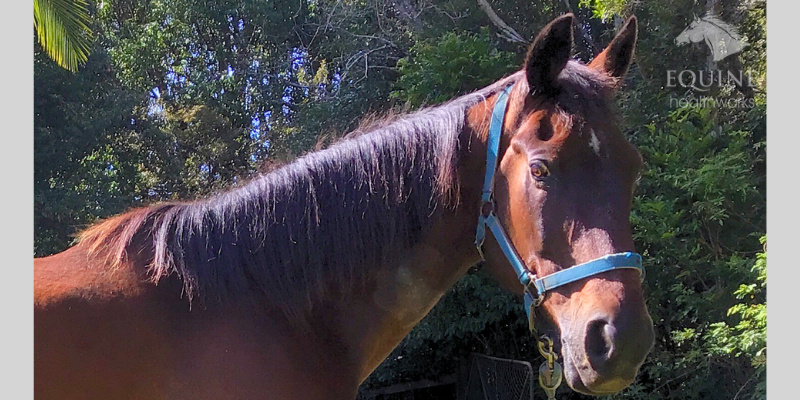
This Arabian was experiencing lumbosacral pain. As with the OTTB earlier, this caused him to constantly rest a hindlimb.

A sequence of photos throughout a session can create an engaging story that is interesting in its own right. (c) thehorsesback.com

A straightforward before and after would have been unconvincing.

On the other hand, a sequence of photos (we have both walks and short breaks during a session) shows him adjusting his posture. This reflects my focus on the day.


7.  Tell the whole story

Ahh, now here’s one that many people overlook when putting together before and after photos.

What was the horse doing the day before, or the day before that, or earlier the same day for that matter?

What else has been happening to the horse between visits that may have made a difference?

If the horse had completed a demanding event just before the first photo, then it’s possible that physical tiredness came into play.

If the horse has had rehabilitation in the form of hoofcare, new training or exercise protocols, a change of saddle, etc, between your visits, then that needs to be mentioned.

Hint: veterinary care is also important!


An old, low res image of an Arabian I worked on with fractured withers. The change in shoulder symmetry was due to work on the cervicothoracic spine (deep to withers). (c) thehorsesback.com 

8.  Is there an identifiable change?

Sometimes, before and after photos are almost the same, but for minor changes that could be down to any of the above points.

They may be valuable, but they don’t show up much in images and take some explaining before they can be seen.

While some background information is helpful, if you’re having to write several paragraphs, then something is missing.

If you have to draw lines on the horse to show changed muscle development, then it’s also possible that your photos aren’t too clear.

Oblique body shots are really hard to repeat accurately. In the second image, the lens is further out from the shoulder and in a slightly lower position. This changes everything and detracts from the real improvements seen.

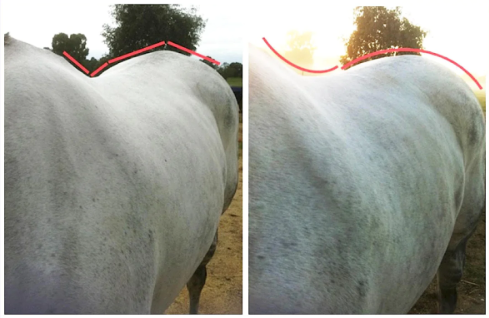
And if you’re doing this, DO draw them correctly. Tracing different outlines or arbitrarily changing a line from straight to curved fools nobody!

Good before and after photos need no explanation, because they create their own impact.


Summary: how to achieve great before and after photos

The best before and after photos are taken:

  • From the same angle.
  • With the same lighting.
  • During the same season.
  • When the horse is standing settled, square if possible.
  • When the horse is not doing anything else.
  • At the same point in the session.
  • After the same work beforehand.
  • When there is a clearly visible change.

This means setting your photos up carefully and being quite technical in your approach. While there’s no need to go full-on scientific, giving a little thought to reducing all the above variables could go a long way to making your photos more effective, both for yourself and other people.

In the end, it’s rarely possible to get everything perfect. What’s important is that enough is correct, so that the images show what can be achieved with bodywork as a vital part of an integrated management approach.

Filed Under: Bodywork, Viewpoint Tagged With: equine bodywork, equine massage, GA

10 Equine Bodywork Responses That Tell Us Heaps About Horses

July 29, 2023 by Jane @ THB 8 Comments

In an equine bodywork session, having a feel for the horse’s mental and emotional state is important.

It helps us to understand where they’re at, why they’re responding the way they do, and how we’re likely to be moving onwards in future sessions. We can then use this understanding to improve our connection and the holistic health outcomes.

Here are 10 of the common responses I see in horses I work with. For ease of communication, I’ve given them names.

It’s not science (and isn’t meant to be), but it is all about listening to the horse.

See any horse you recognise here? Enjoy 😉

(c) Jane Clothier, The Horse’s Back. No reproduction of text or images without permission.


1. The Enthusiast

This horse is the equine bodywork practitioner’s number one fan. If there were a t-shirt, they’d be wearing it.

They nicker at the sight of the therapist, and when led to the yard will often walk alongside their bodyworker instead of their owner. Someone’s made them feel good and THEY LIKE IT.

(c) J. Clothier

As a result, they exude huge warmth and give great cuddles and neck hugs.

And let’s just say they look bereft when ‘their’ therapist arrives and works on a different horse. They’ll probably stand nearby to tune into the energy of the session anyway. 

2. The Child

This horse is often but not always young, projecting an air of total innocence.

And it’s genuine: they’re full of wonder for everything good that happens in their world.

And it’s safe to assume that up until now, it has all been good. As a result, they’re curious about everything that happens around them.

They’ve no defences set up and respond to the GOOD FEELS easily, sometimes apparently to their own surprise.

(c) J. Clothier

Their eyes will lock onto the therapist, the source of this remarkable experience.

Then they’ll turn their head from one side to the other, eyes following you as you move around the yard after the session.

‘Who are you? What did you do? Why am I feeling this?’

It’s impossible not to be enchanted by their bright, beautiful curiosity.

3. The Lightweight

This horse is a sensitive flower who has mixed feelings about this whole therapy business.

Their responses come super quickly, for good or for bad. Then they’ll take a huge amount from very little, and that goes both ways, for better or worse.

They can flinch at the unfamiliar nature of touch. If all’s well after that, they’ll often zone out at the first opportunity.

(c) J. Clothier

If you touch a spot with even a tiny problem, be prepared for flattened ears, a swinging head, tail swishing and a raised foot – sometimes all at once.

This horse is often a mare, affectionately known as ‘princess’ by her owner. But some geldings get complimentary membership too.

Once you get it right, don’t expect thanks, but do take heart watching the softness that unfolds before you.

Next time, you’ll be back to the beginning, but not quite, for now you’ll know very well that less is more.

4. The Superior Being

This trouper of a horse is a great competitor. They brush minor issues aside. They’ll often look down on you from a great height, as if at a mildly irritating fly. They don’t care to do anything as weak as going with the flow – yawning, licking and chewing is for losers.

‘Oh, are you still down there?’ …  goes on to win 1st LWT. (c) J Clothier

They occasionally forget themselves and the eyes start to close. It doesn’t last though: they’ll catch themselves and return to consciousness, with a ripple of irritation.

This doesn’t mean they’re not feeling it. They’ll remain tight-lipped until the pesky human is out of sight, then do all of their letting go in private.

Stallions and lead mares often march to this drum too. 

5. The Survivor

This horse shows you very little at all.

They’ve often been through a previous episode of pain that lasted too long. Or, they may have become used to locking down a source of pain, as they still have a chronic issue today.

At the slightest recurrence of pain, they revert to the lock down posture or attitude they had before. It’s what got them through it last time – they’ve survived by gritting their teeth and ploughing on.

A recent hoof abscess sent this mare back into her old laminitis responses. (c) J Clothier

You can almost hear this horse ignoring you and your hands. When you first work with them, they don’t yield and go with the flow. Instead, they stand with firm lips and a fixed stare.

But unlike the Superior Being, their vibe isn’t a light one.

Any effects happen in their own time, when the halter is off. They may stand in a corner or seek the presence of their closest friend… You’ll only know how well it went on the next visit, when the horse suddenly starts to respond.

6. The Anxious

This is the horse that can’t switch off.

They stand with their head up, always on the lookout, with a giraffe like posture that’s not great for their body and especially not for their neck.

They don’t feel safe and their attention flits around. Their breathing is shallow and/or fast.

Some of them can’t let go. They’ve a nervous system in overdrive and its buzzing signals won’t allow the horse to relax.

(c) J. Clothier

This is your challenge: to help this horse rediscover a deactivated state.

Pain may well be an issue, particularly in its shoulders and neck (and a headache). Nutrition and environment, too. Oh, and humans.

Initially settle for a horizontal neck, with a slightly closed eye being a bonus. 

7. The Controller

This horse prefers not to let go, even if they show early signs of doing so. They step and move around frequently. Displacement activities include chewing the rope, rubbing their head on the handler, a fence, anything. They can be mouthy.

Although there’s no real hostility, there’s a constant ‘push back’ as you work – and you’ll be aware of it. Don’t expect to feel quickly accepted. Better get used to life outside their bubble – and their tough-guy efforts to keep you there, outside their safety zone.

Controlling their space and tuning you out: there’s usually a reason. (c) J Clothier

However, it can all change when you successfully relieve an issue that they never, ever expected to go. Suddenly you’re allowed in and find yourself looking into their huge, deep eyes.

This can be because they’ve been resolutely ignoring an uncomfortable body issue. If so, their fidgeting may have been because you were drawing their focus to exactly that. 

8. The Watcher

This horse may stand in a quiet manner that’s initially encouraging. They may show early signs of relaxation, yet there’s still the feeling that they’re holding something back.

Then whoah! You’re met with a sudden tail swish, a swing of the hindquarters, or a snap of the teeth. You’ve touched a trauma spot and they’re telling you: ‘It’s right there! Watch yourself!’

The horse has some pain and you’ve just committed the cardinal sin of touching it.

(c) J. Clothier

Some may be alert throughout the session as they wait for you to find that spot. Little do you know that you’re being subject to a test. Better tune up your psychic abilities…

No matter what you do, the horse holds on and won’t let go until that breakthrough moment when you find the problem that’s highest in their awareness.

The painful spot may be an old or newer issue, but one thing is sure: there’s a lot of emotion wrapped around it.

Stay safe.

9. The Over-Trained

This horse stands with resolute obedience, as they know they should. They’ve been taught to wait with statuesque stillness, no matter what happens around them.

Whatever happens, they’re just waiting until it’s over, doing their best not to get in the way. They’ve learned that if they do, there’ll be a reprimand or sometimes heavy correction.

Receiving bodywork, these horses are often in their new home, where more self-expression is allowed.

To the therapist, this horse feels mentally and emotionally absent from their own party.

Some horses have been taught that they must remain completely still until asked to move. I find it’s very common with working station horses. (c) J. Clothier

Watch out for this horse’s return to their body, as their responses may be elevated.

They may love you to pieces, or they may shout about a problem that’s been long overlooked. Finally permitted to say what they think, they’ve lost the volume control.

It’s up to you to find a way through this, along with their people.

10. The Depressed

This horse knows it’s not worth even trying to connect or respond, probably because last time they did, it got them nowhere.

Their vibe is a dull one, and their eye contact is minimal or non-existent. They’re not into engaging with you.

They  may stare off into the middle distance, as if disocciating. There’s very little response until the relaxing sensations completely take over – then you may receive a single look, or a tentative touch on the hand.

It’s a start. That has to be enough for now.

(c) J. Clothier

This horse will hopefully learn from the beneficial after-effects of the work. They will slowly start to feel that life can feel better and that humans have something to give.

With these horses, working with their mind and emotions is even more important. If they’ve had physical stresses forced on them in the past (and they usually have, leading to pain issues), the last thing we want to do is pressure them again.

Negotation is always the best way when we need to move forward, with lots of acceptance and thinking time.


Now I said there’d be ten, but there’s one more to come. I don’t meet too many of these extreme cases, and for that I’m grateful.


11. The Broken

This horse is so badly damaged that there seems to be no way back.

Very often, they’ve had multiple negatives in their lives, on multiple levels. Pain is a huge factor, with the horse having a condition that’s been ignored and frequently overridden (literally… it’s often back pain).

Some are both desperate and furious, having been forced beyond their limits. They can be highly dangerous to work with.

This horse has probably given enough for one lifetime – or had it taken from them.

I met this chestnut mare in a UK horse sanctuary. (c) J Clothier

Bodywork is our fleeting gift as we try to help these horses feel better.

By helping to ease their stress, we may to a tiny extent counter the less positive experiences they’ve had at the hands of  other humans.

In return, they take us into a silent place, with depths unknown. Go gently while you’re there.

Filed Under: Bodywork, Viewpoint Tagged With: equine bodywork, equine massage, Equine Massage Therapy, Equine Physio, Equine Sports Massage, equine therapies, Equine Therapist, equine therapy, equine welfare, GA, Horse Health, Horse Massage, horse welfare, Performance Improvement, Physical Therapy, Remedial Massage, Sports Massage Therapist

10 Tips for the Risk-Free Use of Equine Massage Guns

February 10, 2023 by Jane @ THB Leave a Comment

Wait – you didn’t know there could be risks to your horse when using an equine massage gun? Then you’d best read on.

First, there are certainly benefits to  massage guns. They’re easy to use and time friendly when you’re time-poor.

They retail to suit every budget, and there’s no difference between ‘human’ and ‘horse’ devices.

They can help with pre-work warm-up and post-work relaxation, and may help to reduce post-work soreness.

But, but, but – you do need to switch on your mind at the same time as your gun.

And here’s why.

Note: this page includes some links. At no extra cost to you, if you make a purchase, these links may make a small contribution towards the costs of running this site, including my extensive writing time.

1.  Check the horse with your hands first.

This way, you can see if there are any adverse reactions to touching in certain areas. It’s better to know in advance, rather discover a problem with a device that isn’t giving you feedback.

Remember, these are designed primarily to be used by humans on themselves – humans know where their own spots are, or can tell you, but horses rely on you to be cautious.

2.  Vibration is fantastic for myofascia. 

Hydragun with 7 attachments, including 3 flat heads.

Soft tissue generally doesn’t need to be hammered.

Hint 1: using the side of the round massage head will achieve more vibration than percussion.

Hint 2: the less intrusive flat head used gently and flat to the surface also creates more vibration.

Please don’t use the hard pointy applicators, which are so much more likely to hit directly into a painful spot, or worse, penetrate an area of torn fascia.

3.  Go lightly and keep it moving. 

You’re not mashing potatoes here – this is a sensitive body. By minimizing pressure, you’re allowing more of a vibrational effect to happen.

You also don’t risk creating bruises (as can happen in humans, apparently). Your horse can’t tell you until it has already happened.

Don’t work closely over bone – and remember that older horses may have arthritic joints that don’t benefit from heavy percussion.

4.  Little and often is better. 

The Mini Atom is travel-sized with USB-C charging

Too much work starts to cancel out the good work that’s already been achieved through a light approach.

Massage guns are best used on small, targeted areas in short bursts.

And a practical conern is that you don’t want to overheat the device – many have an automatic shut-off after 10-15 minutes for this reason.

5.  Check your horse’s responses.

If your horse is showing any signs of tension, stop. The whole point here is relaxation. Tense muscles + percussion = high impact => pain.

If your horse starts leaning into it and groovin’, then fine, turn it up – but only if they say so.

It’s not a goal in itself (question why they’re so tense in that spot – maybe change something in training?). If there’s any flicker of discomfort in their eye, stop right now.

The Mini Atom Gun enables a focused, smooth and effective approach.

6.  Don’t go higher than the base of neck.

Think about it: you’ll be vibrating the skull. Try that on yourself if you’re not sure why it might be unpleasant!

Lots of horses have tension and pain around the poll and the temporomandibular joint (TMJ). It’s always better to do the upper neck with your hands and a whole lot of love.

7.  Ask why some muscles are always sore.

There may be muscles that are always sore, particularly as your horse steps up the work.

Maybe that spot would benefit from a gentle hand rub?

And maybe slow down the work pace down as well, if tension keeps developing?

Don’t be the Cozy Powell of massage gun users – think prevention and therapy, not heavy rock!

8.  Steer well clear of injuries.

If your horse is injured, don’t try to help with your massage gun. Doing so could likely disrupt the healing process.

Wait until the healing process is well under way and then start really lightly and only in adjacent areas. This is the best time to think about vibration rather than percussion.

9.  Take note of fresh pain responses.

If your horse is reactive in an area that was fine yesterday or last time you worked, stop. You may be right above an injury.

Worse, if you’ve been using too much pressure, you may have intensified an issue.

10.  Don’t forget nutrition.

If muscles are always super-tight in spite of careful conditioning and therapeutic work, there may be an imbalance in your horse’s nutritional and mineral intake that’s having a metabolic effect.


Interested in equine massage guns?

How do you know which massage guns for horses present really good options?

I don’t believe in buying on the basis of a label alone, but at the same time, demonstrated reliability is a good thing.

And don’t worry about whether it’s called an equine massage gun or not. They’re all the same technologies, whether marketed for human or horse use.

Learn more about the Hydragun’s massage gun and the Atom Mini Massager in The Horse’s Back Store. Renowned for being the quietest devices on the market, these excellent, durable devices are built with smoothly operating components within high-grade aluminimum casing. For the equine bodyworker, they offer a reliable solution that is so lightweight it won’t tax your body.


Filed Under: Bodywork Tagged With: best massage guns for horses, equine bodywork, equine massage, equine massage guns, equine sacroiliac, GA, homedics massage guns, massage guns for horses

Footer

Contact Me

Send your questions this way…

Get in Touch

  • Store Support
  • Shipping & Returns
  • Contact

Copyright © 2025 · Parallax Pro on Genesis Framework · WordPress · Log in

MAY Red Light Products Now In Stock! Dismiss