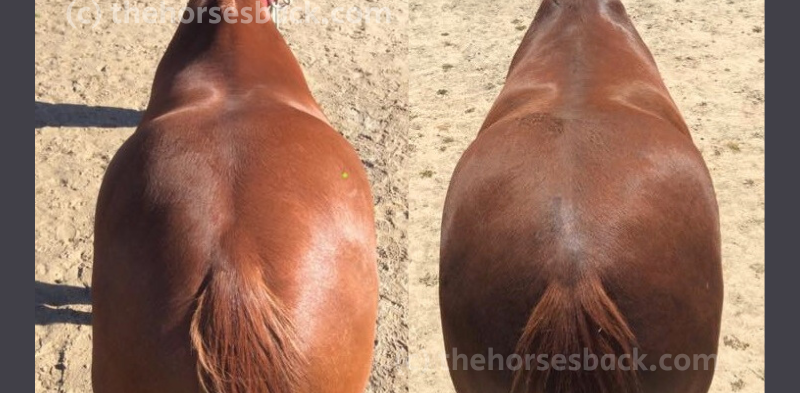
Bodyworkers love before and after photos. Done correctly, they can show great results of our work, making them powerful promotional tools.
Equally, if done incorrectly, they may say something rather different to what we want. In fact, there are many ways to leave areas of doubt and raise viewer questions. That’s why I rarely use them anymore.
To help you avoid some of the pitfalls, here are some pointers for making your before and after bodywork photos more effective.

1. Make sure the horse is standing relaxed and in the same position
It sounds obvious, but so many people get this wrong.
In some photos, the horse is actually doing different things, or looks as if it has just paused during eating, stepping forward, looking into the distance, etc.
All of these things can change its posture, just as post-bodywork relaxation can. This is not comparing like with like.
The horse needs to be standing in a settled state. Standing square if possible, or otherwise in its default ‘parked’ position.
Either way, all four feet need to be on the ground, even if standing square isn’t possible.
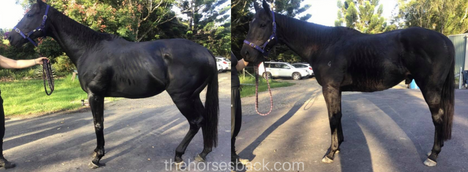
Example 1: When the horse can’t stand comfortably
This OTTB was unable to stand without resting a hindlimb due to his sacroiliac and lumbosacral issues.
While this is part of his problem, and the owner and I knew that, nobody looking at the photos can be expected to know it. He looks like he’s just having a rest. If it’s not self-evident, it’s not worth using.
2. Use the same lens angle
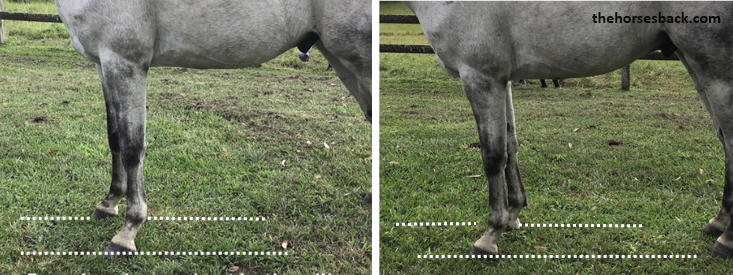
This must be the second biggest error in before and after photos: One photo is taken with the lens angled slightly downwards, while the other is more level. This can unintentionally change how the horse’s outline looks.
Here’s how you can tell.
- First, look at how the lens is positioned for good square-on conformational photos. It’s usually somewhere on the girthline, pointing horizontally around halfway up the horse’s body.
- Now create an imaginary tracking line running in front of and behind each front hoof.
- The distance between these lines should be roughly the same in both photo (when the horse is standing fairly straight).
- If there’s a wider space in one photo, then the lens is probably angled downwards.
- To compare like with like, the distance needs to be the same in both.
3. Ensure the lighting direction is the same
This is simple to achieve, but so many people get it wrong.
Changes in lighting can highlight or obscure ribs, bony landmarks, tight muscles, you name it. There can be numerous changes to what we’re seeing.
Yet in some photos, the horse is in a different location, it’s a different time of day, or even indoors in one photo, and outdoors in the other.
To get a true and fair representation of the improvements, ensure the set up is close to identical in each photo, so that lighting changes don’t create a false impression.
Your great results need to shine on their own.
Example 2: Poor set up
These age-old, low res photos from my files were only taken as records over 15 years ago. Afterwards, I certainly wished I’d organised the taking of them better.
Taken at the start of session 1 and session 3, they show a change in coat colour. However, the passage of time and his weight gain can also account for this…

In this age of Canva, it’s not worth trying to explain changes that can come with other explanations.
4. Take photos in the same season
All too often we see a before photo taken in winter, and an after photo taken in summer.
So guess what? The horse looks worse when it has a long, dull winter coat.
And it looks vastly improved in the summer, when it has a short, gleaming coat. Even more, it has a bellyful of tucker.
It’s better to avoid such a major difference, as it again only serves to obscure your great results.
Example 3: When it’s OK to break the rules
The following photos of the paint horse were originally intended for my personal records.
Shortcomings are clear: the horse is facing a different way; one photo is not fully square-on; horse is looking at camera; standing in a different location in the yard.
The strengths are big ones: same lens height and angle; lighting similar.
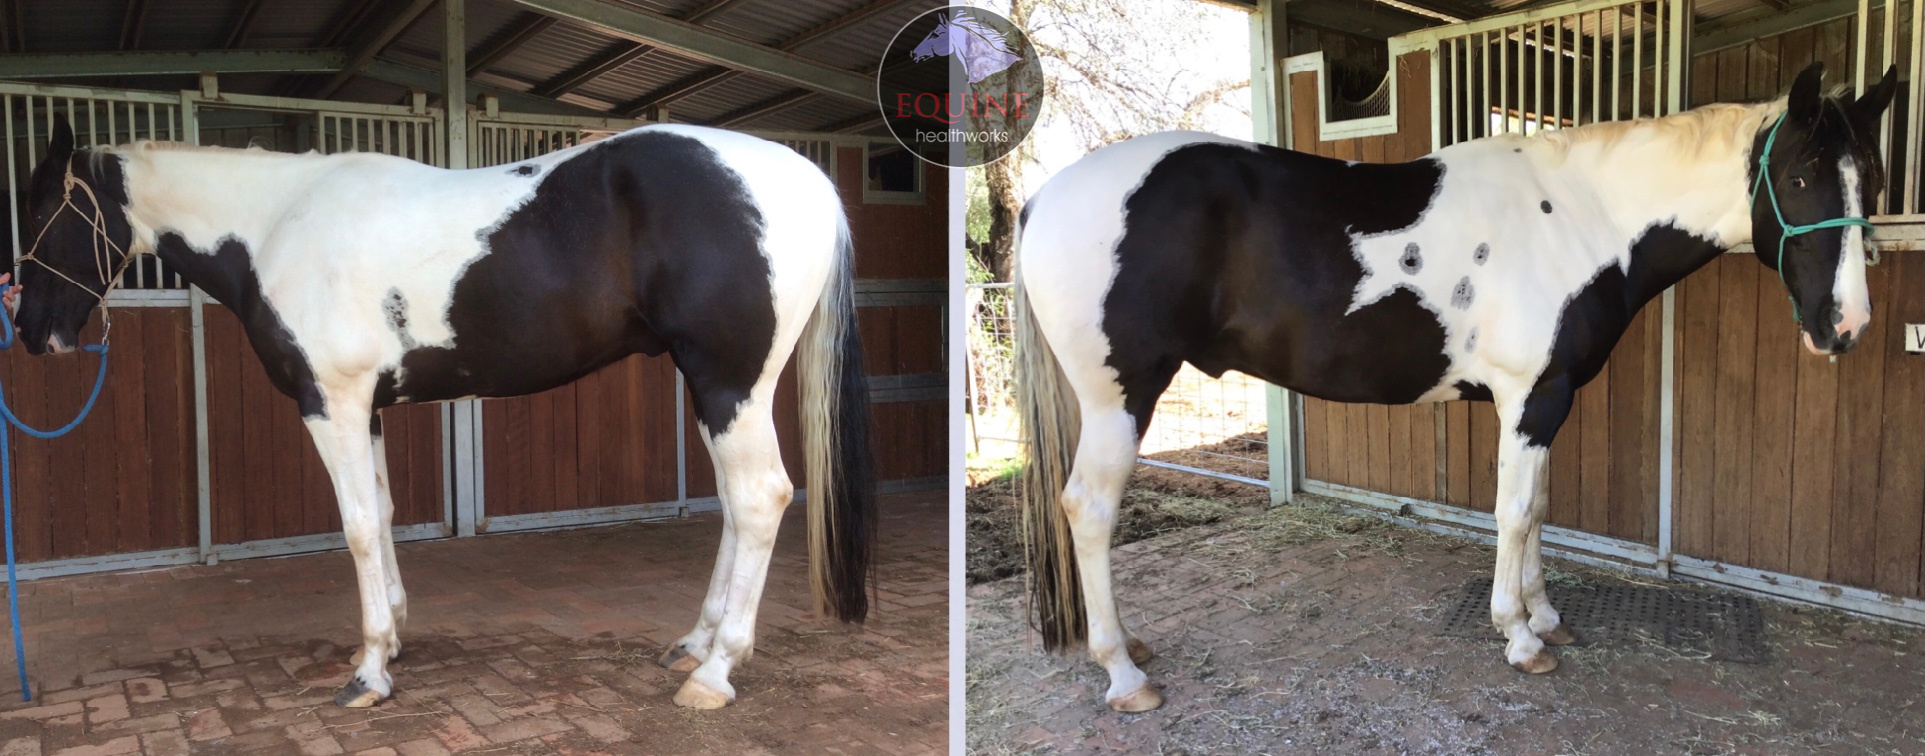
As this is about posture and not muscle development, the changes are unmissable. I gave credit to hoof balance improvement as well as bodywork.
I would never plan to do a before and after in this way – if this horse’s changes had been minor, the photos wouldn’t have worked at all.
5. Include the legs!
It’s very common to see before-and-after photos showing only the horse’s back from a side-on view, or only the hindquarters from the rear.
This is to leave rather a lot of relevant information out of the image.
Why? Because without the limbs and/or head and neck in the image, your viewer can’t assess the horse’s posture.
Instead, they’re asking themselves questions such as: Is the horse standing square? Is it standing under or camped out? Is it angled away from the camera?
Most importantly, the simple matter of foot placement affects how the back and hindquarters appear in your two photos.
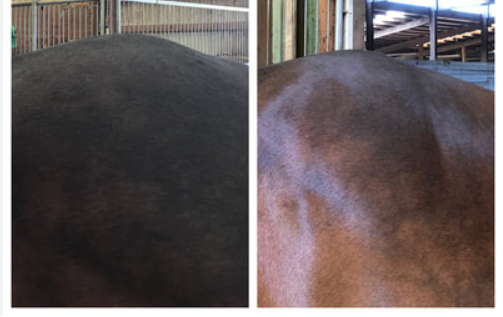
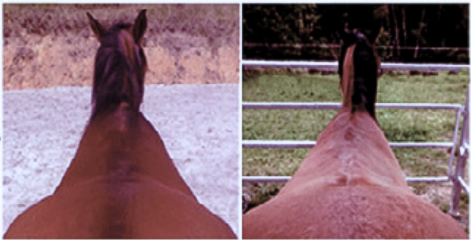
The exception is the overhead view down the back, as the legs obviously can’t be seen. In these cases, including the head and neck is helpful, as it says a lot about posture.
Example 4: Including extra information
Here are the full images of the WB used in the header for this post.
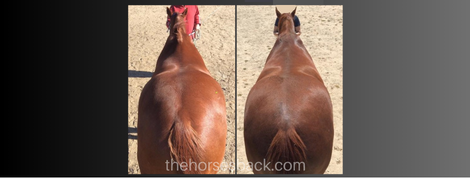
Both pics were taken in the same spot, but at different hours of the day. I couldn’t alter that, but it did mean that the sunlight was different and this accentuates the shoulder imbalance in the first picture.
What is important is that a lot is included in the images. This allows us to reference that the hindquarters are square-on and the head and neck position close to the same height.
I always explain that that the owner was also doing in-hand training with the horse, and had instigated hoofcare improvements.
6. Select the same stage in the session
You are not comparing like with like if your before photo is taken at the start of a session, and the after photo is taken at the end of a session. You may indeed be showing a valid change in the horse, BUT…
Many therapeutic approaches have a pain-relieving effect, which is often temporary. Posture can temporarily improve.
Once the effect wears off, the horse returns to experiencing the uncomfortable effects of its pathologies again. At this point, all the improvements may cease to be visible.
It’s a bit like taking a photo when the horse is on pain relief, and saying ‘here, look at this great change’.
A more valid comparison is to show the horse at the beginning of session one and then at the START of a later session.
This shows how the improvement has held once the horse returned to its regular routine.
Example 5: When a sequence works better
This Arabian was experiencing lumbosacral pain. As with the OTTB earlier, this caused him to constantly rest a hindlimb.

A straightforward before and after would have been unconvincing.
On the other hand, a sequence of photos (we have both walks and short breaks during a session) shows him adjusting his posture. This reflects my focus on the day.
7. Tell the whole story
Ahh, now here’s one that many people overlook when putting together before and after photos.
What was the horse doing the day before, or the day before that, or earlier the same day for that matter?
What else has been happening to the horse between visits that may have made a difference?
If the horse had completed a demanding event just before the first photo, then it’s possible that physical tiredness came into play.
If the horse has had rehabilitation in the form of hoofcare, new training or exercise protocols, a change of saddle, etc, between your visits, then that needs to be mentioned.
Hint: veterinary care is also important!
8. Is there an identifiable change?
Sometimes, before and after photos are almost the same, but for minor changes that could be down to any of the above points.
They may be valuable, but they don’t show up much in images and take some explaining before they can be seen.
While some background information is helpful, if you’re having to write several paragraphs, then something is missing.
If you have to draw lines on the horse to show changed muscle development, then it’s also possible that your photos aren’t too clear.
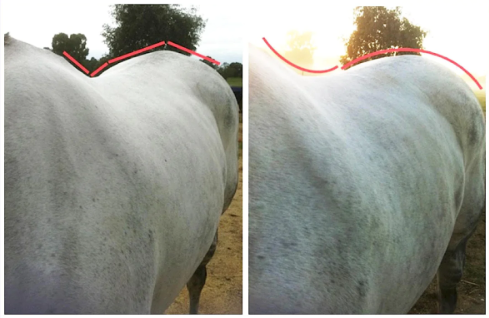
And if you’re doing this, DO draw them correctly. Tracing different outlines or arbitrarily changing a line from straight to curved fools nobody!
Good before and after photos need no explanation, because they create their own impact.
Summary: how to achieve great before and after photos
The best before and after photos are taken:
- From the same angle.
- With the same lighting.
- During the same season.
- When the horse is standing settled, square if possible.
- When the horse is not doing anything else.
- At the same point in the session.
- After the same work beforehand.
- When there is a clearly visible change.
This means setting your photos up carefully and being quite technical in your approach. While there’s no need to go full-on scientific, giving a little thought to reducing all the above variables could go a long way to making your photos more effective, both for yourself and other people.
In the end, it’s rarely possible to get everything perfect. What’s important is that enough is correct, so that the images show what can be achieved with bodywork as a vital part of an integrated management approach.
Extremely helpful points – thanks for explaining the reasons why.
Wonderful tips!
Thank you! It’s very hard to get these right, of course, but I think getting part way there is a good enough goal! It’s one reason I often write ‘unplanned before and after’ when I share two photos showing a horse’s progress.